How to Publish an App: The Ultimate Easy Guide for Non-Coders
Introduction
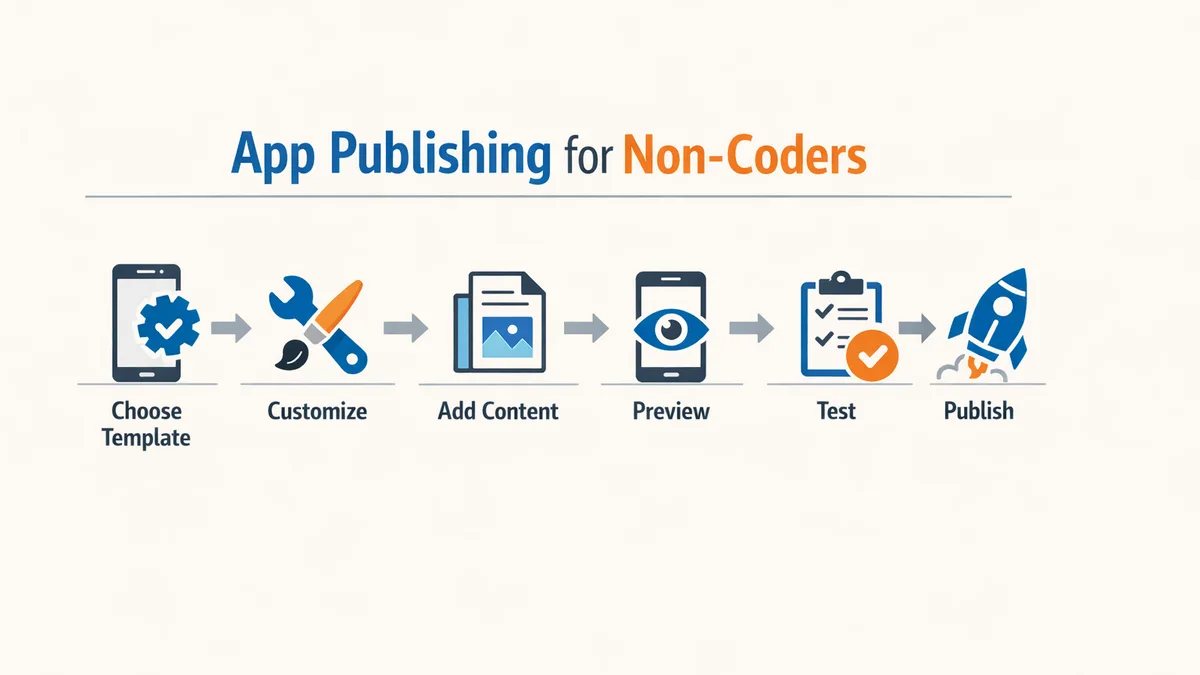
[Image: How to publish an app process infographic showing the complete workflow for non-coders]
How to publish an app is a question every non-technical founder asks when they're ready to launch. You can develop an app even if you don't have coding knowledge or design skills. The barrier to entry dropped years ago, but most guides still assume you're shipping a polished product with a dev team behind you. This one doesn't.
Publishing an app means getting it live on Apple's App Store, Google Play, or both. It's the final gate between your work and real users. The process has rules—some obvious, some arcane—and skipping steps costs you review cycles. If you're planning your first build, knowing what publishing requires shapes how you build from day one.
Submitting your app to Apple and Google is essential for owning your audience and boosting engagement through direct push notifications. A web app can't send push to iOS users without jumping through hoops; a published app can. That direct line matters when you're trying to retain users or recover drop-offs.
This guide walks through the full publishing process—platform selection, account setup, submission requirements, and the mistakes that trigger rejections. If you've built something or you're about to, start with a clear plan so the publishing step doesn't surprise you. The checklist matters more than the code.
Learn how to publish an app with this comprehensive guide tailored for non-coders.
Understanding the App Publishing Process
[Image: A visual representation of the app publishing workflow for non-coders.]
Publishing an app is not a single button push. It is a multi-stage workflow that begins before you write a line of code and continues after your app goes live. The submission process itself is straightforward—most platforms walk you through forms and checklists—but the real work is in how you prepare.
The publishing workflow breaks into three phases: preparation, submission, and post-launch. Preparation includes creating developer accounts, gathering assets (screenshots, descriptions, privacy policies), and ensuring your app meets platform-specific guidelines. Submission is the mechanical part: uploading your build, filling out metadata, and waiting for review. Post-launch covers monitoring feedback, addressing rejection notes if needed, and planning updates.
The Submission Process Is Not the Hard Part
Most frustration does not come from the submission steps. It comes from how the app is built. Apple and Google are strict about quality and compliance—apps crash on launch, violate privacy rules, or lack required disclosures get rejected. The forms are easy; the standards are not.
If you are building without code, you still own the compliance work. No-code platforms handle the technical build, but you are responsible for privacy policies, content guidelines, and user data handling. Reviewers do not care how you built the app—they care whether it works and follows the rules.
For non-coders, the key is to treat publishing as part of the build process, not an afterthought. Start gathering assets early. Read platform guidelines before you finalize features. If you are using a no-code tool, check whether it auto-generates compliance artifacts or if you need to supply them manually. Many rejections happen because builders assume the platform handles everything.
The publishing process itself is not hard, but the platforms are strict about quality and compliance.
What Happens During Review
When you submit, your app enters a queue. Apple reviews manually; Google uses a mix of automated checks and human review. Both look for crashes, guideline violations, and misleading metadata. Apple's review typically takes 24–48 hours; Google's can be faster but is less predictable.
If your app is rejected, you get a list of issues. Fix them, resubmit, and wait again. This is normal. First-time submissions often get rejected for minor issues—missing age ratings, vague privacy disclosures, or placeholder text in the description. The rejection email tells you exactly what to fix.
For non-coders using tools like Vibe Coding 101: How Non-Technical Founders Build Real Apps With AI, the build-test-submit loop is faster than traditional development, but the review timeline is the same. Plan for at least one rejection cycle when scheduling your launch.
How to Publish an App: 7 Key Steps
[Image: An illustrated list of essential steps in the app publishing process.]
Publishing an app follows a sequence you can break into discrete tasks. Each platform has its own quirks, but the core workflow stays consistent. You build, you test, you prepare assets, you submit.
Complete Your Build and Test Thoroughly
Before you touch a submission form, your app needs to work. Run it on real devices if you can. Check every screen, every button, every data flow. Crashes during review mean rejection. Bugs that slip through mean one-star reviews you can't delete.
Prepare a privacy policy even if your app collects nothing. Both Apple and Google require a publicly accessible URL. A single-page statement on your domain works. No policy means no approval.
Step 1
Generate signing credentials
For Google Play, generate an upload key and keystore. Sign your app with that key, then configure Play App Signing in the console. For iOS, enroll in the Apple Developer Program and create certificates in Xcode. These credentials prove the app came from you.
Step 2
Register your developer account
Apple charges an annual fee. Google charges once. Create accounts well before your target launch date—verification can take days. You cannot submit without a registered account in good standing.
Step 3
Prepare store assets
Screenshots, app icons, feature graphics, descriptions. Each platform publishes exact dimension requirements. Use those dimensions. A 512×512 icon submitted as 511×511 gets rejected. Write a clear, honest description. No one reads marketing fluff; they skim for what the app does.
Upload and Submit for Review
For iOS, create an app record in App Store Connect, upload your build via Xcode or Transporter, add metadata, then hit submit. For Android, upload your signed APK or AAB to the Google Play Console, fill in the store listing, set pricing and distribution, then publish.
Both platforms run automated checks first—missing permissions, broken links, policy violations. If those pass, human reviewers test your app. Apple's review typically takes one to three days. Google's can be faster but varies.
If you're working through a vibe-coding workflow, confirm offline access and user flows match what you described in metadata. Mismatches trigger rejection.
Choosing the Right Platform
You built an app. Now you need a storefront. The platform you pick determines who sees your app, what you pay to distribute it, and how much friction sits between your user and the install button. Most non-coders default to iOS and Android because that's where the users are, but Windows, web marketplaces, and private distribution channels solve different problems.
The platform decision is a business decision dressed up as a technical one. If your users live inside a corporate environment, a private Google Workspace listing might matter more than the public Play Store. If you're targeting gamers on PCs, Microsoft Store becomes relevant. If you want the widest possible reach with the least gatekeeping, progressive web apps bypass stores entirely—but you lose discoverability and the trust signal that comes with App Store approval.
Public vs. Private Distribution
Public apps can be viewed and installed by anyone who uses the marketplace, while private apps are only available to users within the organization. This distinction matters when you're building internal tools or piloting with a closed group before a wider launch. Private distribution skips the public review queue and lets you control exactly who gets access, but you sacrifice organic discovery and the credibility boost of a public listing.
If you're a solo founder testing an MVP, private distribution buys you time to fix rough edges before the app hits public scrutiny. If you're trying to grow a user base, public is the only path that scales without a sales team.
Platform Economics and Monetization
Microsoft Store offers flexible monetization options, allowing developers to use their own commerce platform and choose a revenue model that fits their business. Apple and Google take 15–30% of in-app purchases depending on your revenue tier; Microsoft's terms are often more favorable for developers who want to handle payments themselves. If your app generates revenue through subscriptions or one-time purchases, platform fees compound quickly—run the math before you commit.
Some platforms let you link out to your own payment flow; others forbid it and will reject your app if you try. Know the rules before you design your pricing page.
| Platform | Reach | Fee Structure | Review Speed | Best For |
|---|---|---|---|---|
| iOS App Store | High (mobile) | 15–30% | 1–3 days | Consumer mobile apps |
| Google Play | High (mobile) | 15–30% | Hours to days | Android-first markets |
| Microsoft Store | Medium (desktop) | Flexible | Variable | Windows desktop apps, games |
| Google Workspace Marketplace | Targeted (enterprise) | Variable | Moderate | Internal/enterprise tools |
| Progressive Web App | Unlimited (web) | 0% (self-hosted) | Instant | Cross-platform, low friction |
Choosing Based on Your User
Pick the platform where your user already spends time. If you're building a productivity tool for remote teams, a web app or Workspace listing makes more sense than forcing them to download something from the iOS App Store. If you're building a game, mobile stores and Microsoft Store are the default. If you're not sure, ship a web app first—it's the fastest way to validate demand without paying platform fees or waiting in review queues.
Distributing through Microsoft Store is a strong choice for both apps and games, providing a centralized destination for Windows customers to discover and install experiences. That centralization matters when your target user is already on Windows and expects to find software in one place.
For more on planning your app before you pick a platform, see What Is a PRD? A Plain-English Guide for Non-Technical Founders.
Creating an App Store Account
Before you can publish, you need a developer account on each platform. Apple charges $99 per year. Google charges $25 once. Both require real payment details and verified identity.
Account Setup Basics
Apple Developer Program enrollment takes 24–48 hours for approval. You'll need an Apple ID, two-factor authentication, and a credit card. Google Play Console approval is faster—usually same-day—but Google enforces a 14-day closed testing period before your first public release.
Both platforms verify your legal entity details. If you're publishing as an individual, use your legal name exactly as it appears on government ID. If you're a business, have your EIN or business registration number ready. Mismatches here delay approval by days or weeks.
Play App Signing for Android
Google offers Play App Signing, which lets Google manage your app's signing key. This increases security and simplifies updates—you don't risk losing the key that locks you out of your own app. Enable it during your first upload. Once enabled, Google holds the production key; you keep an upload key for submitting builds.
If you skip Play App Signing and lose your signing key later, you cannot update your app. You'd have to publish a new app under a new package name and migrate users manually.
What You'll Need
- Apple: Apple ID, payment method, legal name or business entity, phone number for 2FA
- Google: Google account, payment method, legal name or business registration, test track plan (internal/closed/open)
Both platforms let you manage multiple apps under one account. You pay the account fee once, then publish as many apps as you want. For detailed guidance on turning your idea into a shippable build, see I Have an App Idea: The Ultimate Simple Guide for Founders.
App Submission Requirements
[Image: How to publish an app: chart displaying common submission requirements across various platforms]
Every platform has its own checklist. Miss one item and your app sits in review limbo for weeks. The good news: most requirements overlap. Get the basics right once and you're 80% done for every store.
Core Technical Requirements
Your app must run without crashing. That sounds obvious, but stores test on multiple devices and OS versions. If it fails on an older iPhone or a budget Android, you're rejected.
You need a working build in the correct format—IPA for iOS, APK or AAB for Android. The file must be signed with your developer certificate. If you built with a no-code tool, it usually handles this. If you coded it yourself, double-check the signing config before upload.
Performance matters. Apps that drain battery, overheat devices, or load slowly get flagged. Test on real hardware, not just emulators.
Privacy and Compliance Documentation
Privacy compliance is the leading cause of rejection. You must disclose every piece of user data your app collects—even data gathered by third-party SDKs you embedded. Apple requires a Privacy Manifest file that declares what user data is collected and which third-party SDKs are used. Google demands similar disclosures in your app's privacy policy.
Link your privacy policy in the submission form. It must be publicly accessible and written in plain language. No policy means automatic rejection.
Content and Metadata Standards
Your app listing needs screenshots, an icon, a description, and keywords. Screenshots must show actual app functionality—no mockups or placeholder text. The icon must meet size and format specs: 1024×1024 PNG for iOS, 512×512 for Android.
Write a clear description. Avoid marketing fluff. Reviewers check that your app does what you claim. If your description promises features the app doesn't have, you're rejected.
Age ratings are mandatory. Answer the content questionnaire honestly. If your app has user-generated content or web browsing, expect a higher rating and stricter review.
Platform-Specific Checklists
Apple App Store requires you to test on TestFlight first. Google Play lets you submit directly but recommends internal testing. Both platforms scan for malware and policy violations automatically before human review.
For Google Workspace Marketplace, ensure your app complies with their terms, meets review criteria, and has a website and logo for its listing. The requirements are lighter than consumer app stores but still strict on privacy and functionality.
If you're publishing a web app or progressive web app, requirements are simpler—mostly hosting, HTTPS, and a manifest file. But if you want it listed in app stores, you still need to package it correctly.
Testing and Validation Before Submission
Run through your app as if you've never seen it. Click every button. Fill every form. Try to break it. Stores reject apps with broken links, missing images, or dead-end screens.
Test edge cases: no internet connection, low storage, permissions denied. Your app should handle these gracefully, not crash.
If you're a non-coder, this is where vibe coding for beginners pays off—you built it, so you know where the weak spots are. Fix them before the reviewer finds them.
Common Pitfalls to Avoid
According to Apple's 2024 transparency report, reviewers examined 7.7 million app submissions and rejected 1.9 million—a 24.7% rejection rate. Most rejections stem from preventable mistakes.
Skipping Guidelines Before Submission
Most founders submit without reading platform policies. Apple and Microsoft both publish detailed requirements. Skipping them means your app hits a wall on day one.
Read the guidelines twice. Once for the big rules, once for the edge cases that apply to your specific app category.
Incomplete Metadata and Assets
Missing screenshots, vague descriptions, or placeholder icons trigger instant rejections. Reviewers don't guess what you meant.
Prepare every required asset before you open the submission form. Screenshots must match the current build. Descriptions must explain what the app does in plain terms.
Ignoring Certification Requirements
Store certification checks ensure your app meets quality standards and policies. Microsoft's process flags apps that crash on launch or violate privacy rules. Apple's reviewers test every user flow.
Test on real devices before submission. Emulators miss hardware-specific crashes. If your app needs permissions, make sure the prompts explain why in user-friendly language.
Submitting Untested Builds
Rushing a build to meet a deadline means shipping bugs reviewers will catch. They test signup flows, payment screens, and edge cases you forgot existed.
Run through every feature as if you've never seen the app before. If you're building with vibe coding workflows, test the AI-generated code paths twice—generated logic often breaks on unexpected inputs.
Assuming Approval Means Launch
Approval doesn't mean your app is ready for users. It means the app meets minimum platform standards. Real users will find issues reviewers missed.
Plan a soft launch. Release to a small group first. Monitor crash reports and user feedback before scaling distribution.
Tips for Successful App Publishing
Publishing is the easy part. Keeping the app alive after launch is where most non-coders stumble. You need a listing that converts, metrics that tell you what broke, and a plan for the first thirty days when nobody knows your app exists.
The steps below assume you already cleared submission. Now you optimize the parts that drive installs and retention.
Optimize Your Store Listing
Your app store page is a landing page. Treat it like one. Run A/B tests on your icon, screenshots, and description copy to find what drives installs. Google Play Console offers built-in experiments for graphics and localized text—use them before you spend money on ads.
Write your short description in plain language. If a user can't understand what the app does in ten seconds, they bounce. Test different value propositions: "Track expenses in one tap" beats "Comprehensive financial management solution."
Monitor Quality Metrics From Day One
Android vitals surface crash rates, ANR (app not responding) events, and battery drain before users leave one-star reviews. Check the dashboard weekly. A 2% crash rate sounds small until you realize it's two hundred angry users at ten thousand installs.
iOS has similar diagnostics under Xcode Organizer. If you used a no-code tool, ask support how to access crash logs—most platforms surface this data in their dashboards.
The cheapest bug fix is the one you deploy before the user notices.
Use Platform-Specific Growth Tools
Google Play offers market insights that show search trends and competitor install estimates. If you're targeting a niche, these reports tell you whether the market is growing or saturated. iOS App Store Connect has less granular data, but the trends tab shows where your installs come from—organic search, browse, or referrals.
Both platforms let you reply to reviews. Do it. A thoughtful response to a two-star review often gets updated to four stars. Ignore a one-star complaint and it sits at the top of your listing forever.
For more context on planning before you build, see What Is a PRD? A Plain-English Guide for Non-Technical Founders.
Plan Your First-Month Promotion
No platform will promote your app automatically. You need a launch plan: email your network, post in relevant communities, and consider a small paid test ($50–100) to validate your store listing. If your conversion rate is under 20%, fix the listing before you scale spend.
Track where installs come from. Use UTM parameters in your links so you know which Reddit post or email drove real users. Most analytics tools (Firebase, Mixpanel) integrate directly with app store data.
Who Should Publish an App
Anyone who needs software to solve a problem should consider publishing an app. The barrier is lower than most people think: you can develop an app even if you don't have coding knowledge or design skills. The question isn't whether you're qualified—it's whether you have a reason to ship.
Solo Founders and Bootstrappers
If you're building a product business, publishing an app is the fastest way to test whether people will pay for your solution. Solo founders benefit most when they can iterate without hiring a dev team. A business app builder is a platform that allows teams to create custom applications for operational work without writing traditional code—these tools let you validate demand before you commit to a full technical buildout.
Operations Teams and Department Leads
People who run workflows inside larger organizations often need custom tools that don't exist off the shelf. If you manage inventory, customer support, or internal processes, publishing a lightweight app can replace spreadsheets and email chains. You don't need IT approval to prototype; you need a clear view of the problem and permission to test a fix.
Consultants and Service Providers
If you deliver repeatable services—coaching, project management, compliance tracking—publishing an app gives clients a branded experience and reduces your manual workload. The app becomes a lever: you build it once, and it scales without adding hours to your calendar. For more on turning a structured process into a working prototype, see Turn Spreadsheet Into App: The Ultimate Easy First Build.
Conclusion
Publishing an app without writing code is no longer a fantasy. The path from idea to live store listing is shorter than most non-technical founders expect—especially if you treat the submission process as a checklist, not a mystery.
You've seen the core steps: pick your platform, set up your developer account, package your build, and satisfy the review requirements. None of it requires a CS degree. What it does require is patience with bureaucracy and a willingness to read the guidelines twice.
The biggest mistake is waiting for perfection. Ship a working v1, collect real user feedback, and iterate in public. Apple and Google both approve updates faster than first submissions, so your second release will teach you more than six months of internal debate.
Owning your audience through direct push notifications and in-app engagement beats renting attention on someone else's platform. With Apple devices driving 67% of consumer in-app spending according to industry studies, the economics favor getting your app into the official stores sooner rather than later.
If you're still at the idea stage and need a structured way to think through what you're building, start with a clear product requirements document—it makes every downstream decision faster. Then build, submit, and learn from what breaks. The only unforgivable move is not shipping at all.
Frequently Asked Questions About How to Publish an App
How long does it take to publish an app?
Apple's App Store review typically takes 24–72 hours. Google Play can approve apps within hours to a few days. Account setup and asset preparation add another 1–2 weeks to your timeline.
Can I publish an app without coding experience?
Yes. No-code platforms like Bubble, Glide, and Adalo let you build and publish apps without writing code. You still need to handle compliance, privacy policies, and store requirements.
How much does it cost to publish an app?
Apple charges $99/year for a developer account. Google charges a one-time $25 fee. Additional costs may include privacy policy hosting, app signing certificates, and optional services like app store optimization tools.
What are the main reasons apps get rejected?
The most common rejection reasons are missing privacy policies, crashes during review, misleading metadata, incomplete app functionality, and failure to meet platform-specific design guidelines.
Related reading
MVP Scope: The Ultimate Guide to Cutting Features the Easy Way